
A few months ago, I took on making a gaming table for a friend. The dimensions for the table were based upon the ideal space each player would have for his or her gaming pieces.

The table needed to be a hexagon where 2a = 60″ (or a = 30″)! That is a big table! So after brainstorming with my friend, I set out to make a table with the following characteristics,
1.) Be a hexagon with a 60″ width
2.) Sit on a pedestal to optimize leg room and maintain a classic game table appearance
3.) Have a playing surface of foam covered in felt
I did a bunch of research on gaming tables. The biggest complaint people had was with the felt they used or not using foam. This made me think about the maintenance aspect of the table and how it would be nice if it was made in such a way where it could be re-felted easily. After a few iterations, I decided on two table tops, essentially. The First Table-Top would be the playing surface, made from 3/4″ plywood, covered in 1/4″ foam and red gaming suede. The Second Table-Top would house the First Table-Top. It would have a 3.5″ trim around the perimeter, creating a valley for the gaming surface to sit in. This way, the center gaming surface could be removed and re-felted without having to dismantle all of the trim. Because of the 3.5” perimeter, the Second Table-Top would be 67” at its narrowest point. Therefore, I knew I would need to glue-up a panel since the largest plywood I could get locally was 60″. See my blog post, “To Dowel or Not to Dowel” for how I made this panel.
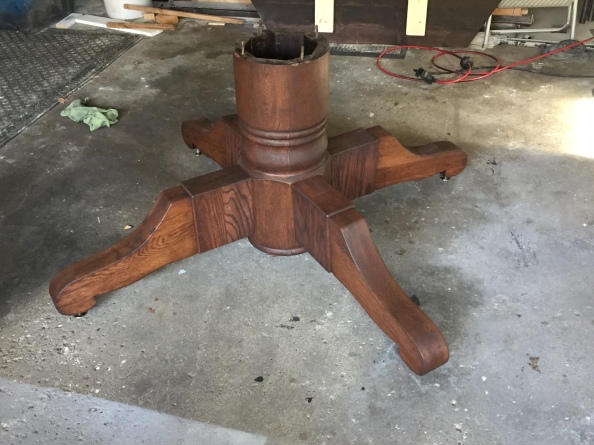
The other major design decision was what base to use. I mentioned above that we decided to use a pedestal. See my blog post, “All About that Base” for how I altered an old pedestal to withstand a much larger tabletop.
The only steps I didn’t yet post about were the creation of the gaming surface, a.k.a. the First Table-Top. Foaming and felting a piece of plywood was definitely out of my wheelhouse of experience so I was the most nervous about this step. Especially because the “gaming suede” a.k.a. “speed cloth” is super expensive as is the foam in these large dimensions. So I knew if I messed it up, it was going to be a costly mistake. I researched some techniques for felting a pool table and figured out a strategy. I then just went to town during my daughter’s nap one afternoon with my pneumatic stapler. Full disclosure, if anyone actually does re-felt this table one day, I feel extremely bad for them as I used about 1000 staples! But it turned out amazing!
So after the base was done,
and after the First Table-Top was done,

and after the Second Table-Top was done,

I had to assemble the three pieces. The original pedestal table had an “X” shaped piece of wood that connected the base to the table top. It was in really good shape, so early on I just used that same “X”. After about a month, I noticed that the one side of the table was dipping. Upon further inspection, the center of the “X” where the pieces were notched out was failing. The Second Table-Top was just too heavy for the original “X”. After some hard thought, my husband and I decided to attach it using two parallel pieces of steel tubing. This worked great, but by using a parallel configuration instead of an “X”, it created a weird moment about the pedestal which allowed for a lot of vibration in the one direction. To stop this, my husband and his dad welded an angle iron that they used as a diagonal brace (see picture below). I had ZERO to do with this part of the table. So all the cred must go to my husband and father-n-law for making my beautiful table also functional. Hindsight being 20/20 and all, we (I mean my husband) would have welded two angle irons in the shape of an “X” and attached them to the pedestal to replace the wood “X”. Apparently the “X” shape really does serve a purpose.

I used a 1/2″ oak quarter-round tacked in with 18 ga nails to “affix” the First Table-Top to the Second Table-Top (the two table tops are actually not attached but the quarter-round holds the gaming surface tight against the Second Table-Top and prevents it from coming out). The quarter-round is the only piece that would require removal to re-felt the gaming surface!
I won’t get into all the mistakes I made along the way. Like how I glued/nailed the oak trim 1/8″ too small such that the First Table-Top would NOT fit within the Second Table-Top!! I ended up using a 1/8″ rabbeting bit around the internal perimeter. Then used a flush-trim bit with the ball-bearing against the rabbit to carve out the rest of the material. Ugh, don’t make me go back there… it is too painful! I think that was my only major error. On the plus side, I now have a rabbeting bit set!
Well I hope you like the table as much as I do. And I hope my friend likes it as much as I do too!

So very cool. I’d love to see a picture of it all put together ad sittig in its new home. Perhaps your friend can give you a picture to post here? I really enjoy followig this blog!
LikeLike
Ha, only three years too late.
Here is a link to its current home!
https://scontent-ort2-2.xx.fbcdn.net/v/t1.0-9/83882078_1431889873650462_5684213857036271616_n.jpg?_nc_cat=101&_nc_ohc=Xuqx-kEDI6IAX9BAsbt&_nc_ht=scontent-ort2-2.xx&oh=4760e96b795f7eb569737240548453b8&oe=5EC68ABC
LikeLike